Vizard 7 » Tutorials & Examples » Getting your feet wet » Setting the Scene
7.6
To set the scene we'll add a model of an Italian piazza using the viz.addChild command. This command can be used to load any Vizard compatible 3D model into the virtual world.
Run the script by clicking the run icon ![]() or pressing F5.
A graphics window will appear and you'll find yourself in the center of
the piazza with a fountain ahead of you. Take a little time now to get
familiar with Vizard's built-in mouse
navigation. See if you can make your way through the arch and out
of the piazza.
or pressing F5.
A graphics window will appear and you'll find yourself in the center of
the piazza with a fountain ahead of you. Take a little time now to get
familiar with Vizard's built-in mouse
navigation. See if you can make your way through the arch and out
of the piazza.
When you have finished exploring the world, you should close the graphics window (either click the close box or press <ESCAPE> ).
You may have noticed that you could navigate through 3D models. When using mouse navigation it can be useful to turn on collision detection to prevent this from happening. Add the following line at the bottom of your script:
Run the script to see the effect collision detection has on navigation.
By default, when a model is added, it's center point (defined in the modeling software) is positioned at the origin of the virtual world. In the case of the piazza model, it's center is located at ground level in the center of the courtyard. The initial viewpoint position is 1.8 meters above the origin, or [0,1.8,0] in X,Y,Z coordinates. This explains why the viewpoint is just above the center of the courtyard when the script begins.
The following image shows Vizard's coordinate system. The axes are color coded so that RGB matches XYZ (ie X = red, Y = green, Z = blue).
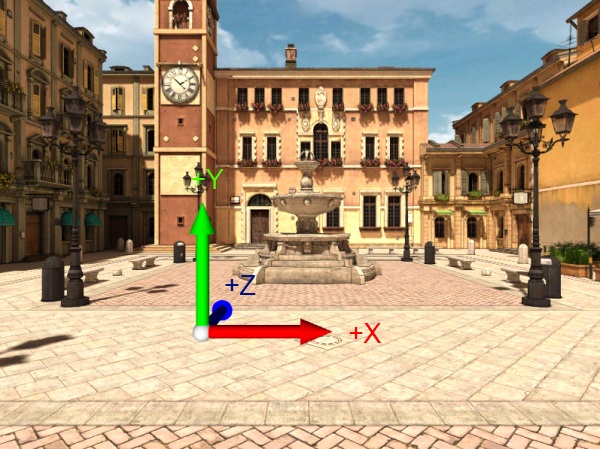
Add the following lines of code to display a model of the coordinate axes and run the script:
Initially you will not see the axes model because it's placed at the origin and the viewpoint is directly above. Move back a bit and you'll see it come into view. The axes ball marks the origin of the virtual world.
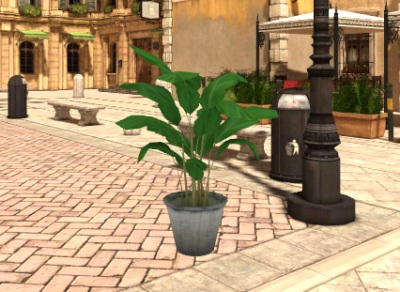
With an understanding of Vizard's coordinate system you can place other objects in the scene using the node3D.setPosition command. Vizard's unit of measurement is the meter so X,Y,Z coordinates are always specified in meters. The code below will add a plant next to the lamp post on the right:
Before moving on to the next section of this tutorial copy and replace your code with the following. This includes commands that will improve the visual quality of the rendered scene and increase the field of view:
The viz.setMultiSample command is called to perform anti-aliasing so jagged edges are smoothed out. The line with the viz.fov command increases the vertical field of view from the default 40 degrees to 60 degrees (the horizontal FOV is based on the vertical FOV and aspect ratio of the window and will also increase). When running in windowed mode it's often nice to increase the field of view. Run the code and see the difference these two lines make: