Vizard 8 » The Vizard IDE » Inspector » Inspector
8.3.1
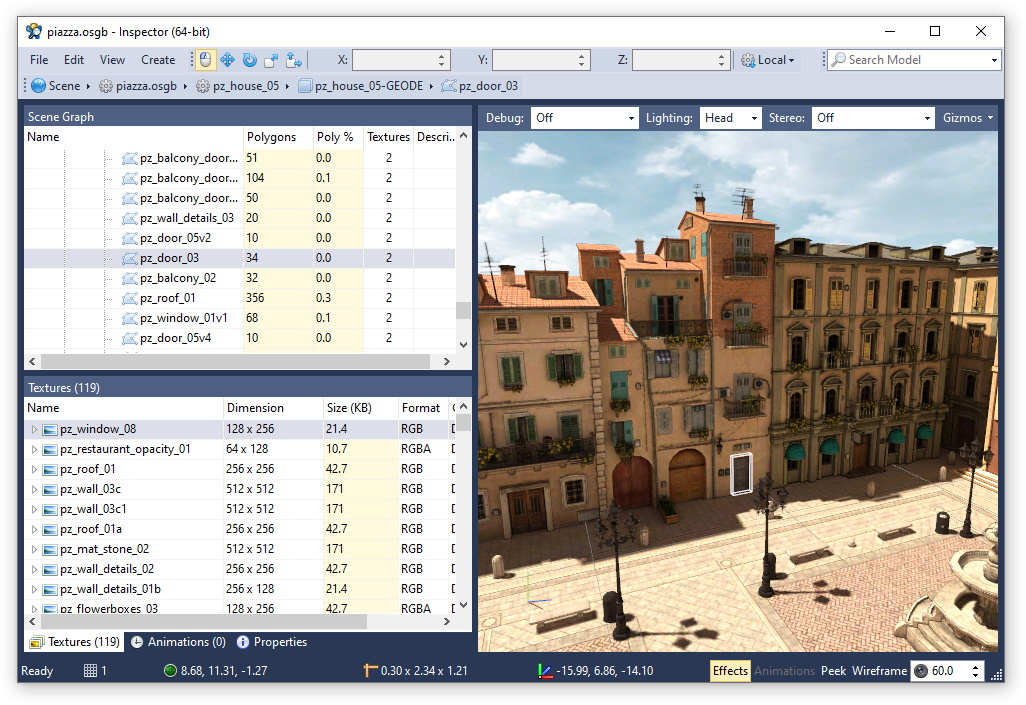
Inspector is a visual browser and editor for Vizard / OpenSceneGraph (OSG) compatible 3D models. You can use it to:
There are several ways you can load a model into Inspector.
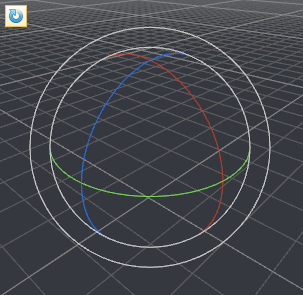
Use the mouse to navigate around the model in the viewport:
Orbit: Hold the left mouse button down, then drag to rotate the camera around the current pivot point. The initial pivot point is set to the center of the models bounding box. The pivot point can be set to be any model sub-part by double clicking that part or pressing Z when a part is selected.
Zoom: Scroll the mouse wheel to zoom the view in/out. This will essentially increase or decrease the distance to the pivot point.
Pan: Hold the middle mouse button down, then drag to pan the camera relative to the current orientation.
Dolly: Hold both the left and right mouse buttons down, then drag up/down to move the camera forward/backward relative to the current orientation. The distance to the pivot point is not changed.
Set Pivot: Holding the shift key while clicking the left mouse button will set the pivot point at the selected intersection point. The distance to the pivot point is not changed.
Flythrough: Holding the right mouse button down and dragging will enter flythrough mode. While in flythrough mode you can use the following controls:
Use fullscreen mode to expand the view of the model and help with navigation. Pressing F2 will toggle fullscreen on the monitor the Inspector window is currently inside. When in fullscreen mode, Inspector will display only the view pane and hide all other UI components (i.e. menu tabs, toolbars, panes, etc.).
By copying 3D position and camera data you can easily position objects and set the viewpoint where you want it in the Vizard scene. Right click any point on the model and select Copy 3D Position to copy the 3D coordinates of that point to the clipboard. Right click any time while navigating in the viewport to copy data about the current camera position and orientation.
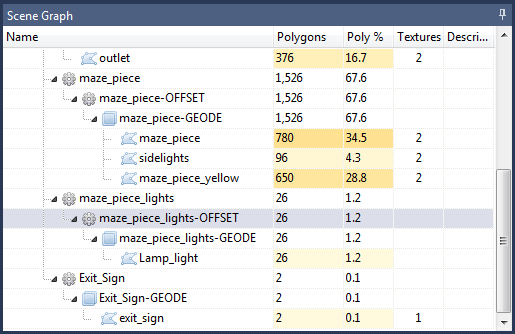
Browse the scene graph by expanding/collapsing the scene graph tree or through drop down selections in the node path toolbar:
Single click a name in the tree to display a selection box around the corresponding sub-part in the viewport. Double click a name to select the part, center it in the viewport and set it to be the rotation origin.
Single or double clicking a part in the viewport will have the same effect as described above while highlighting the corresponding name in the scene graph tree.
The scene graph tree contains the following columns for each node:
The legend below defines the icons that appear in the scene graph tree:
![]() Node: The base type for all nodes in the scene.
Node: The base type for all nodes in the scene.
![]() Transform: A node that has position, orientation, and scale information.
Transform: A node that has position, orientation, and scale information.
![]() Animated Transform: Supports animations based on translation, rotation, and scale.
Animated Transform: Supports animations based on translation, rotation, and scale.
![]() Geode: A node that contains geometry and other drawable objects.
Geode: A node that contains geometry and other drawable objects.
![]() Geometry: Triangles that form the frame of the object. This is what is visible when viewing the object in wireframe mode.
Geometry: Triangles that form the frame of the object. This is what is visible when viewing the object in wireframe mode.
![]() Texture: An image that adds surface detail to geometry.
Texture: An image that adds surface detail to geometry.
![]() Light: A light source node.
Light: A light source node.
![]() Sequence: A sequence node will treat each child as a frame in an animation and automatically cycle through them.
Sequence: A sequence node will treat each child as a frame in an animation and automatically cycle through them.
![]() Occluder: An occluder node
can be used to hide all geometry that appears behind it.
Occluder: An occluder node
can be used to hide all geometry that appears behind it.
![]() Switch: A switch node can be used to control the visibility of its children nodes.
Switch: A switch node can be used to control the visibility of its children nodes.
![]() Level of detail (LOD): Used to swap models (e.g. high poly/low poly) based on the model's distance from the viewpoint.
Level of detail (LOD): Used to swap models (e.g. high poly/low poly) based on the model's distance from the viewpoint.
![]() Avatar: Vizard's supported character format.
Avatar: Vizard's supported character format.
![]() Scene: Top level node.
Scene: Top level node.
![]() Group: An empty node without geometry used to group child nodes together. Similar to a transform without the overhead of position, orientation, and scale information.
Group: An empty node without geometry used to group child nodes together. Similar to a transform without the overhead of position, orientation, and scale information.
![]() External Reference: References an external resource file. This is useful when the external file is a component shared between models. Changes to the shared component can be made in a single file.
External Reference: References an external resource file. This is useful when the external file is a component shared between models. Changes to the shared component can be made in a single file.
![]() Text: A node used to display text in the 3D world.
Text: A node used to display text in the 3D world.
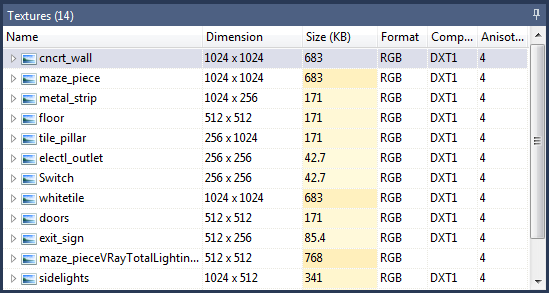
The texture pane lists all the textures in the scene. Clicking a texture will display it in the viewport. If the texture contains an alpha channel, you can right-click the viewport and have it render only the RGB or Alpha channel. Expand the arrow sign to the left of the texture to see the object(s) that it's applied to.
The textures pane contains the following columns for each texture:
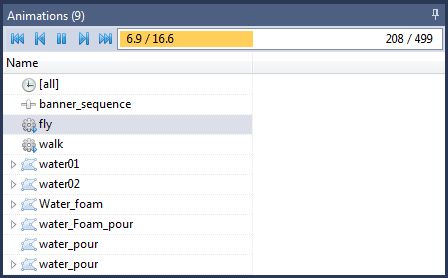
The animation pane lists all the animations in the scene. These can include animated transforms, animated UVs, sequence nodes, and avatar animations. Clicking an animation will select the associated node and activate the following controls at the top of the pane:
![]() Go to first frame
Go to first frame
![]() Go to previous frame
Go to previous frame
![]() Pause animation
Pause animation
![]() Play animation
Play animation
![]() Go to next frame
Go to next frame
![]() Go to last frame
Go to last frame
The progress bar next to the controls displays the current time of the animation. The values on the left represent the current/total time of the animation in seconds. The values on the right represent the current/total frames of the animation. Clicking on the animation progress bar will set the current animation to the corresponding time. Dragging the mouse will scrub through the animation.
Selecting an avatar animation will automatically begin cycling the animation on the avatar. Choosing the [none] animation on the avatar will clear all animations and place the avatar into its default pose.
The [all] animation is displayed when there are multiple animations in the scene. Selecting this animation allows controlling all animations simultaneously. The time/frame values represent the maximum duration and frame count of all animations.
Certain animations can be expanded to display a list of all instances of the animation within the scene.
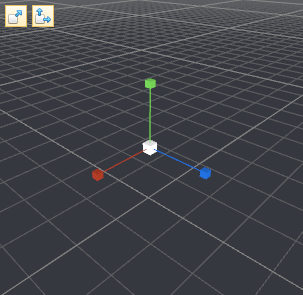
To move, rotate or scale a model or sub-part:
To use the transform gizmo either:
|
|
|
|
| Translate (W) | Rotate (E) | Scale (R) |
The type-in lets you enter precise transformation values. The values are applied relative to the local, parent, or global coordinate system:
![]()
There are several ways to add new nodes to the scene graph:
To move elements within the scene graph right click a node in the hierarchy and select Cut, Copy, Paste Instance, Paste Copy, or Delete:
Use the Properties pane to edit the names of nodes in the scene graph and their material properties.
Note: Many of the material options access low level OSG properties. These are difficult to manipulate without knowledge of OpenSceneGraph.
In the status bar, located at the bottom of the window, you will see information about the current selection and viewport related controls:
![]() Displays the length of the smallest grid square. The grid size adjusts according to the viewpoint location. The further away the viewpoint is, the larger the grid size and length of each grid square.
Displays the length of the smallest grid square. The grid size adjusts according to the viewpoint location. The further away the viewpoint is, the larger the grid size and length of each grid square.
![]() Displays the camera position.
Displays the camera position.
![]() Displays
the size of the selection bounding box.
Displays
the size of the selection bounding box.
![]() Displays the position of the selection origin.
Displays the position of the selection origin.
Effects: Toggles auto-generated shader effects.
Animations: Toggles between playing and pausing animations. If the model does not have animations, this control will be disabled.
Peek: Toggles peek mode on and off. Peek mode reveals the current selection by graying out the rest of the scene. This can help to clearly identify the sub-part and is useful for viewing parts that are partially or completely obscured.
Wireframe: Toggle viewing models in wireframe/fill mode
![]() Increases/Decreases the camera FOV
Increases/Decreases the camera FOV

The Node Path toolbar displays the parent hierarchy of the current selected node. Clicking a node item within the toolbar will change the selection to that node. Clicking the arrow next to an item will display a drop down list of all the nodes children. The selected child in the hierarchy will be displayed in bold. Selecting an item in the drop down list will change the selection to that child.

The Search toolbar provides a quick way to search for objects within the model. Use the Alt + D keyboard shortcut to place the cursor inside the toolbar and begin typing your search phrase. As you type, the Find Results pane will be populated with matching node and texture results. Single or double click a node result to select the object in the viewport and show it's location in the scene graph tree. Click on a texture result to display the image and show it's location in the texture pane.