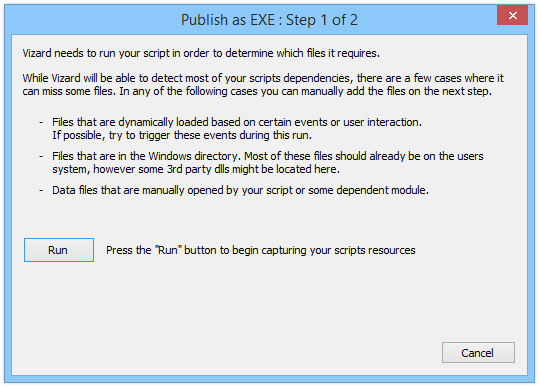
To begin the Wizard, select the File > Publish as EXE menu option. This will immediately launch your project. This is the chance for the Wizard to discover all the projects dependencies. If there are assets that are dynamically loaded, you can either see to it that all resources are loaded during this period or proceed to the next step where you can manually add files to your published version.
When you launch the Wizard you will first see:

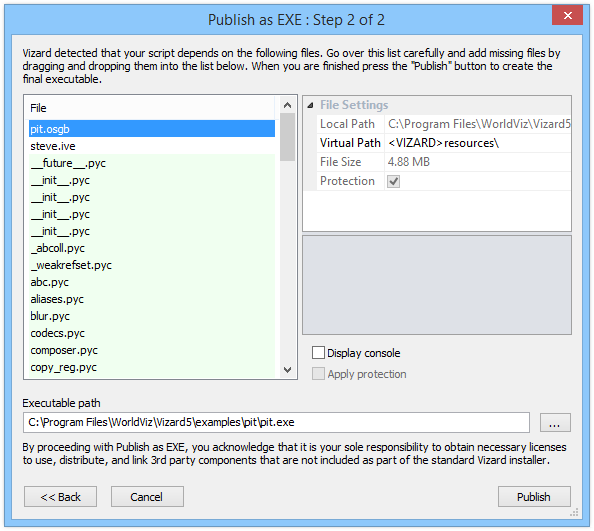
After you run the project and exit, you see something like what's shown below. The left pane displays all the found dependencies color coded. The pink files are system DLLs. The green files are python files. The white are your project's source and media assets. If you click on any single file you see its local and virtual path and other information. This is your opportunity to add extra project files by dragging and dropping into the left pane. You can also right-click in the left pane to add or remove files instead of dragging.
Note: It is recommended that you place all your project resources underneath the root directory of your script when publishing to an EXE. Using resources from outside directories can create conflicts in certain situations.

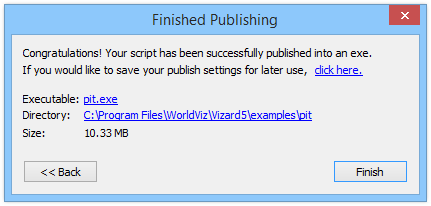
Once you are ready to create the published EXE, click the "Publish" button. Depending on the size and number of resources in your script, it might take a while to generate the EXE. When the published EXE is successfully generated you will see the following dialog:

Your new published EXE should be ready to use and distribute now. From this dialog you can optionally save your publish settings to an XML file. This file will contain a list of all your publish resources and custom settings which can make it easier to generate EXEs later on. It is recommended to save the publish settings file in the same directory as your main script. When you want to regenerate your EXE select the File > Import Publish Settings... command in Vizard. This will display a standard file open dialog which allows you to select the publish settings file. After you have selected the file you will be immediately taken to step 2 of the publish wizard, bypassing the need to run your script.
Note: Importing publish settings will not detect new resource dependencies. If you have added new files/resources to your script since the last time the publish settings were generated, you will need to regenerate the publish settings by going through the entire publish wizard ( File > Publish as EXE ).