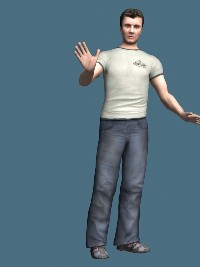
Avatar animations can come from many different sources. The most common is to use a high-end key frame animation tool specialized for producing human body motions. An application that works very well with Vizard is 3D Studio Max. Another increasingly popular method is to use motion capture equipment that is capable of recording the motions of an entire body in real-time.
An alternative to those mentioned is to control the avatar's joints directly and manually create your own animations. While this can be useful for simple animations, it is important to note that it is difficult to create complicated motions.
The following tutorial will help you to animate an avatar manually, by controlling its skeleton.
Note: This content is discussed in more detail in the reference section.
If you have trouble getting the code in this tutorial to work, you can find the complete example script animatingAvatarBones.py in the \tutorials\avatars directory.
This tutorial will create an avatar that keeps their head looking at the view. We will use avatar "bones" to move the avatar with our Vizard code. Each Vizard avatar has a skeleton and each bone in this skeleton has a name. You can explore an avatars skeleton after you have added a model to a script. The following code adds a female avatar, sets her position and orientation, then animates her.
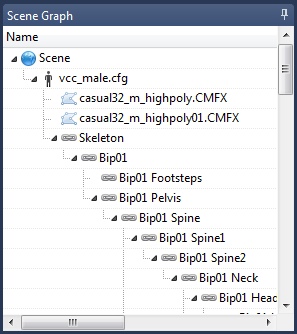
The avatar should now appear in the Resources pane in Vizard. Double-click the avatar to view it in Inspector. The avatars skeleton hierarchy will appear under the Skeleton section in the Scene Graph pane (as seen below):

To access any of the bones of the avatar in your script, use the <node3d:avatar>.getBone method. Add the following lines to your script to grab a handle to the avatar's neck and spine bones:
To manually move a bone, you need to use the “lock” command. This command disables the avatar's built-in animations from moving the bone so that your adjustments are not overwritten.
An avatar's bones exist in a hierarchical skeleton, thus the head bone is the child of the neck bone. This parent child relationship means that any transformation performed on the neck bone will also occur for the head bone. This will allow use to move the two bone's together by just modifying the neck bone.
Now we can transform the neck and head without the built-in avatar animation interfering and the avatar's head follows the viewpoint as it moves around the world. To do this we set the position of the bones in a function that will be called every frame by a timer event:
Run the script and watch the avatar's head rotate such that when you are in front of her, she is always facing you.
Now lets add some code to the faceView() function that rotates the avatar's torso when the viewpoint moves behind the avatar. This helps make a more realistic animation as the avatar must turn farther to the side. However, we begin to see the difficulty of creating complex manual animations, as many bones must be moved together for a realistic effect. Also, when the avatar starts looking over her shoulder her arms start to move inside of her torso and the torso begins to twist unnaturally. If you needed your avatar to be able to look over her shoulder you should probably create a "look over shoulder" animation in a character animation package and slightly rotate the bones from this animation. Replace the code we just added with the code below:
For additional examples, check out: