Vizard 8 » Tutorials & Examples » Vizconnect » Inputs and Transports » Tutorial: Input and Transport Basics
8.3.1
Inputs are devices which have some detectable state change or provide some signal trigger. Standard input devices include keyboard, mouse, and joystick. In Vizconnect, input signals are used to control transports and other components. Transports are used to move the viewpoint or objects around the environment and are similar to trackers in providing position and orientation information. However, transports are completely virtual and support navigation techniques not possible with physical trackers. A transport can be used on its own or combined with a tracker to move the viewpoint or an avatar through the Vizconnect interface. Linking a model to a transport is done through the script that imports the configuration file.
In this tutorial we'll add a driving transport and walking tracker. The tracker will be a child of the transport so when the transport moves the tracker will move with it. At the same time, the tracker can move relative to the transport. The result will be a simulation where the user can drive, park, and get out of a car and walk around.
First create a folder (e.g. Inputs and Transports Tutorial) on your desktop to save the files that will be created in this tutorial. From the Tools tab in Vizard, select the Vizconnect option. From the Vizconnect Startup page, select option 3 to go to the Advanced Menu. Click the Save As button in the lower left corner of the GUI, navigate to your tutorial folder on the desktop, and save the configuration as vizconnect_config.py. All changes made to the configuration will automatically be saved in this file.
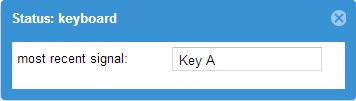
Next, let's add a keyboard input device. From the Inputs
tab, go to Add a New Input and select the Keyboard option. This
allows us to use any key as an input signal. After you click Apply & Exit,
take a look at the last signal field in the Status ![]() window. This is an easy way to verify that whatever input
you've added is sending data to Vizard.
window. This is an easy way to verify that whatever input
you've added is sending data to Vizard.
From the Transports tab, go to Add
a New Transport and select the Driving
option. A driving transport moves forward/backward with left/right steering.
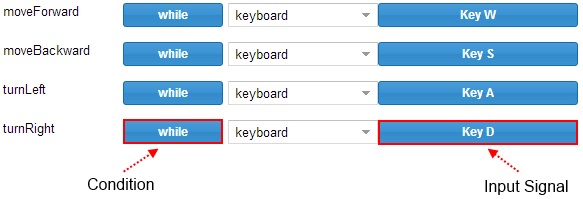
Click Apply & Exit and open the Mappings ![]() dialog box. This
is where input signals get mapped to transport controls. Both mapping conditions
and signals can be changed by clicking on the blue buttons. Click on each of the input signal buttons and set them to match the image below:
dialog box. This
is where input signals get mapped to transport controls. Both mapping conditions
and signals can be changed by clicking on the blue buttons. Click on each of the input signal buttons and set them to match the image below:
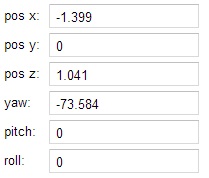
The Status ![]() window
shows the current position and orientation of the transport. The driving
transport is limited to XZ position and yaw orientation movements. We'll
be able to visualize the movement once we've linked an object to it.
window
shows the current position and orientation of the transport. The driving
transport is limited to XZ position and yaw orientation movements. We'll
be able to visualize the movement once we've linked an object to it.
Open up the Vizard editor, create a new script, and add the lines of code below. Save the script in your input and transports tutorial folder with the vizconnect_config.py file. This adds an environment model and a car linked to the transport. Run the script and use the WASD keys to drive the car: