Transports and trackers often work well together to move the viewpoint. The user can move around naturally with physical tracking and cover large distances or move in other ways not physically possible with the transport. In this section of the tutorial we'll add a display and a tracker. The display and its viewpoint will be linked to the tracker and the tracker will be linked to the transport.
Note: This section continues with the configuration and script used in the previous section.
From the Trackers tab, click Add a New Tracker and select the Mouse and Keyboard Walking option. Leave the settings at their defaults and click Apply & Exit.
From the Displays tab, click Add a New Display and select the Custom Window option. Leave the settings at their defaults and click Apply & Exit.
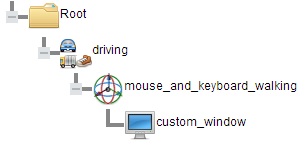
Drag and drop the nodes to match the image below:

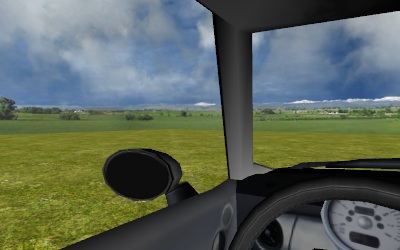
Run the script again to test the new component hierarchy. The WASD keys move both the car and the viewpoint while the mouse and arrow keys move only the viewpoint. Notice that the viewpoint is above the car and the command below no longer affect's its position:
The reason is that once the viewpoint is linked to an object (e.g. tracker, transport, avatar), the link will override any commands that set its position and orientation.
The viewpoint's starting position [0,1.82,0] is the same as the virtual
walking tracker. By applying an offset to the tracker, we can move the
viewpoint behind the steering wheel. Go back to the Trackers
tab, select the tracker, and open the Offsets ![]() dialog box. Add the following offsets:
dialog box. Add the following offsets:

Run the script again for a driver's point of view. If we were using a physical tracking system with an actual seat we would probably use a different method to place the user inside the virtual car. The easiest way would be to apply an offset to either the tracker or car relative to the navigator. Another way would be to match the position of the seat in tracking space to the virtual seat position.
