Browse Scenes
The scene browser is the initial interface when you launch PRISM. It displays a list of all available scenes from your local machine and the PRISM server.
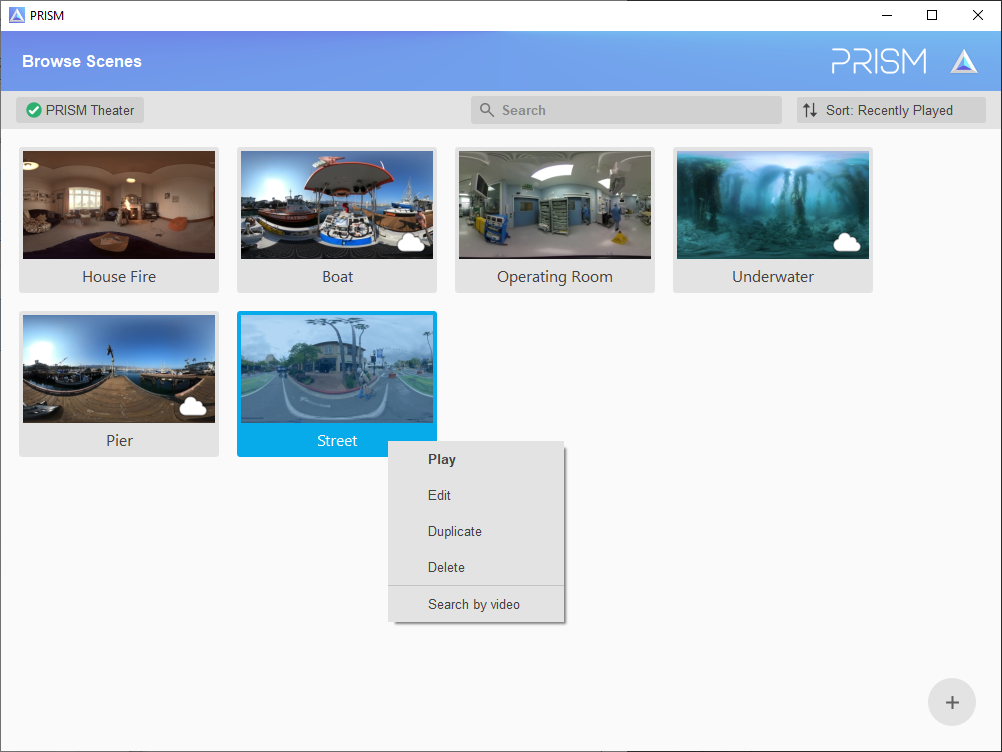
To play a scene either double-click the scene or right-click and select Play. See the Play Scenes page for more information on playing scenes.
To edit a scene, right-click the scene and select Edit. See the Edit Scenes page for more information on editing scenes.
Server Scenes
Scenes that only exist on the PRISM server will contain a cloud icon in the lower right corner of the scene thumbnail. If your machine is not on the same network as the PRISM server, then the server scenes will not be displayed. When you Edit a server scene for the first time, the scene and all associated assets will be downloaded from the server. Once the scene is downloaded, the cloud icon will be removed since a copy of the scene is now stored locally.
When connected to the PRISM server, the toolbar above the scene list will display the name of the server. You can click on the server name to perform the following actions:
- Sessions: Lists the most recent sessions on the server. Click a session to open the session log viewer.
- Configurations: If the server contains multiple display configurations, they will be listed here and you can click on a configuration name to switch to that configuration.
- Start Gallery: Start the scene gallery on the server.
- Turn Theater On: Turn on all the projectors connected to the server.
- Turn Theater Off: Turn off all the projectors connected to the server.
- Server: If there are multiple servers on the network, they will be listed here and you can click on a server name to switch to that server. The scene browser will display scenes and play scenes to the selected server. The All server option allows you to browse scenes on all the servers and playing a scene will select the first available server.
Search/Sort Scenes
The toolbar above the scene list allows searching and sorting scenes.
To search scenes, enter text within the search field to only show scenes matching the entered text. Click the ‘X’ button at the end of the search field to clear the entered text and display all scenes again. The search terms will be matched against the scene name, description, and tags. Entering multiple search terms will match scenes containing all the terms. You can use the or keyword to match scenes containing either search terms. For example, searching “cat dog” will match scenes that contain both the term “cat” and the term “dog”. Searching “cat or dog” will match scenes that contain either the term “cat” or the term “dog”. You can exclude a term by placing a minus symbol next to it. For example, searching “cat -dog” will match scenes that contain the term “cat” and do not contain the term “dog”.
To sort scenes, select from one of the following options from the sort menu:
- Name: Sort by the scene name
- Recently Modified: Sort by date modified, from recent to oldest
- Recently Played: Sort by date played, from recent to oldest
You can also filter the scene list to all scenes that use a specific main video. Right-click any scene that uses the main video you are interested in and select Search by video. The scene list will now only display scenes using the same video. Click the Show All Scenes button at the top of the list to revert back to displaying all scenes.
Create scenes
You can create a new scene one of the following ways:
- Import video: Drag/Drop any supported video file into the scene list to create a new scene. Alternatively, click the ‘+’ button in the lower right corner of the list to browse for a video file.
- Import scene: You can import a previously exported .prism scene file by dragging/dropping the file into the scene list. Alternatively, click the ‘+’ button in the lower right corner of the list to browse for a .prism file.
- Duplicate scene: You can create a copy of an existing local scene by right-clicking the scene and selecting Duplicate. The Duplicate option is not available for scenes that only exist on the server. You will need to select Edit first in order to download the scene and all assets.
Delete scenes
To delete a scene, right-click the scene and select Delete. The Delete option is only available for scenes that exist on the local machine. If the scene exists both locally and on the server, only the local copy will be deleted and the scene will now be displayed as a server scene.
Export scenes
To export one or more scenes, click the PRISM logo at the top right corner of the navigation bar and select Export Scenes. You will be prompted to select which scenes you would like to export. Click the scenes you would like to export, or use the Select All or Clear Selection buttons to update your selection. Once you have made your selection, click the Export button to export the scenes and all associated assets to a .prism file. The exported scenes can be used to backup your scenes or share it with other users. To import a .prism scene file, simply drag/drop the file into the scene browser screen.